Upload Images With Node.js And Express To The Cloud Using Cloudinary

Today's websites and mobile applications worldwide requires the functionality to upload image somewhere to the cloud for storing and easy retrieval since in most cases images must be stored somewhere in the cloud for easy management (storing, retrieval, integration etc. ) and not directly into a database. Luckily Cloudinary comes to help us get this done in a few simple steps using Node.js and Express so
WHAT IS CLOUDINARY ?
Cloudinary is a SaaS technology company that provides a cloud-based image and video management services.
WHAT IS CLOUDINARY USED FOR ?
With Cloudinary, you can easily upload images and videos to the cloud and automate smart manipulations of those media without installing any other software. Cloudinary then seamlessly delivers your media through a fast content delivery network (CDN), optimized with the industry’s best practices. It basically enables users to upload, store, manage, manipulate, and deliver images and videos for websites and applications.
Additionally, Cloudinary offers comprehensive APIs and administration capabilities, which you can easily integrate with your web and mobile applications.
In this guide you'll learn how to upload images to Cloudinary with the Node.js SDK which provides simple, yet comprehensive image and video upload, transformation, optimization, and delivery capabilities that you can implement using code that integrates seamlessly with your existing Node.js application.
To begin, you must be able to use the terminal, familiar with Node.js, Npm, Github, you must also have Cloudinary account, if you don't, sign up for free here to get your API Key and other credentials needed for the project.
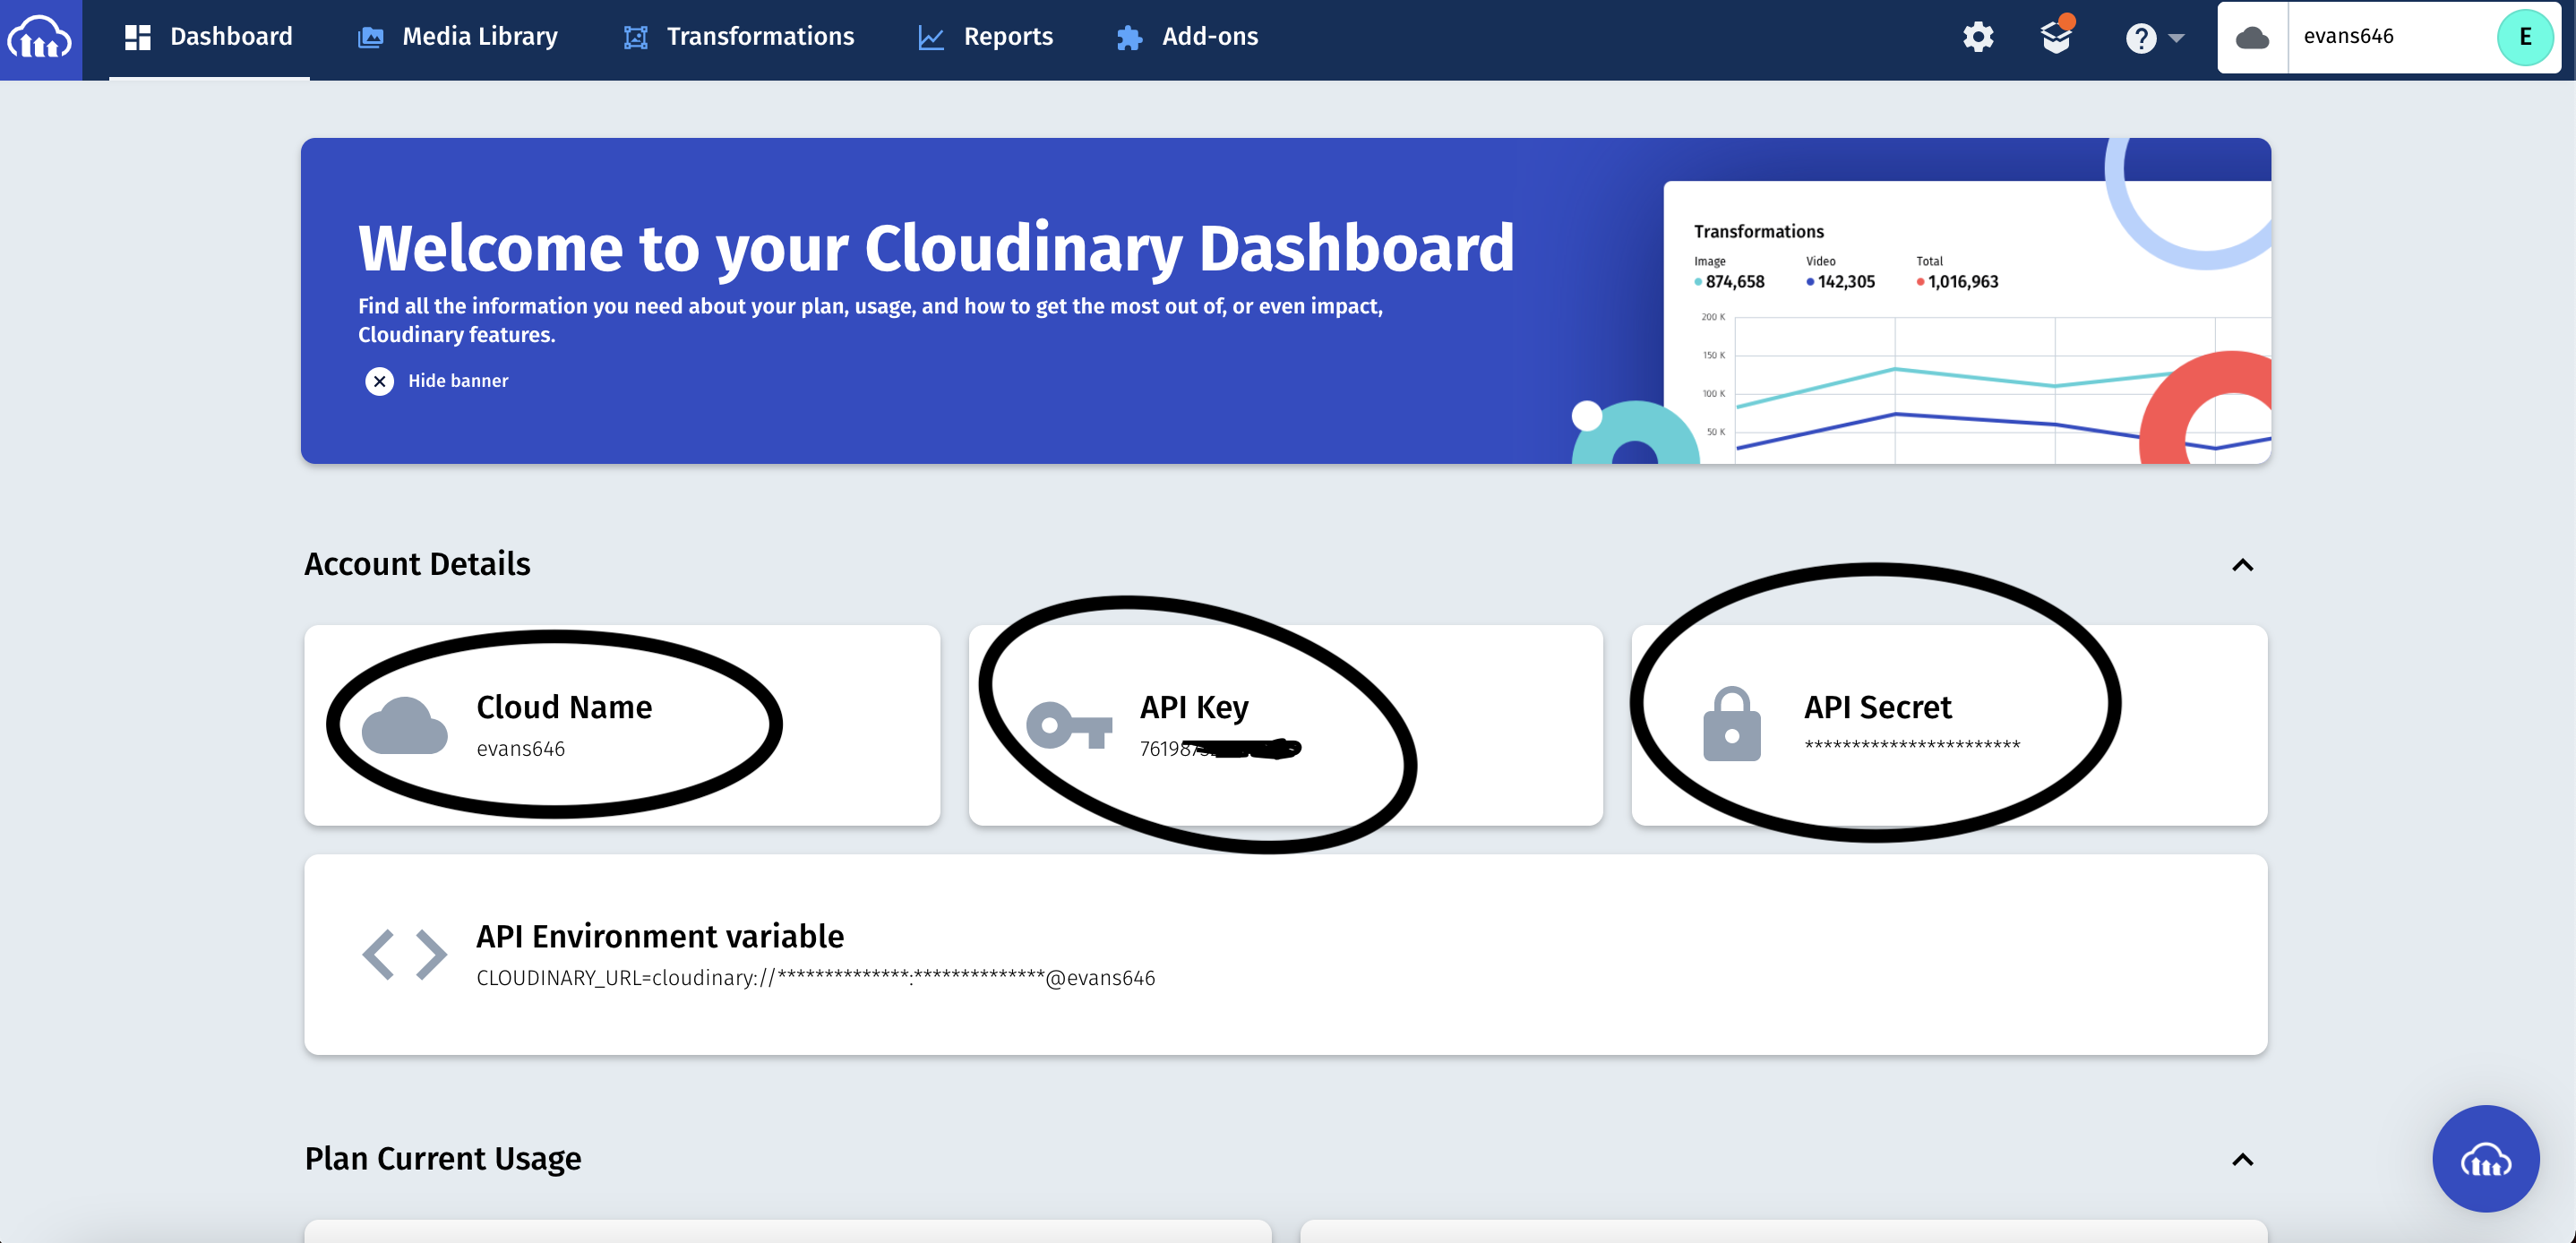
After signing up, it should take you to the dashboard, which looks like this
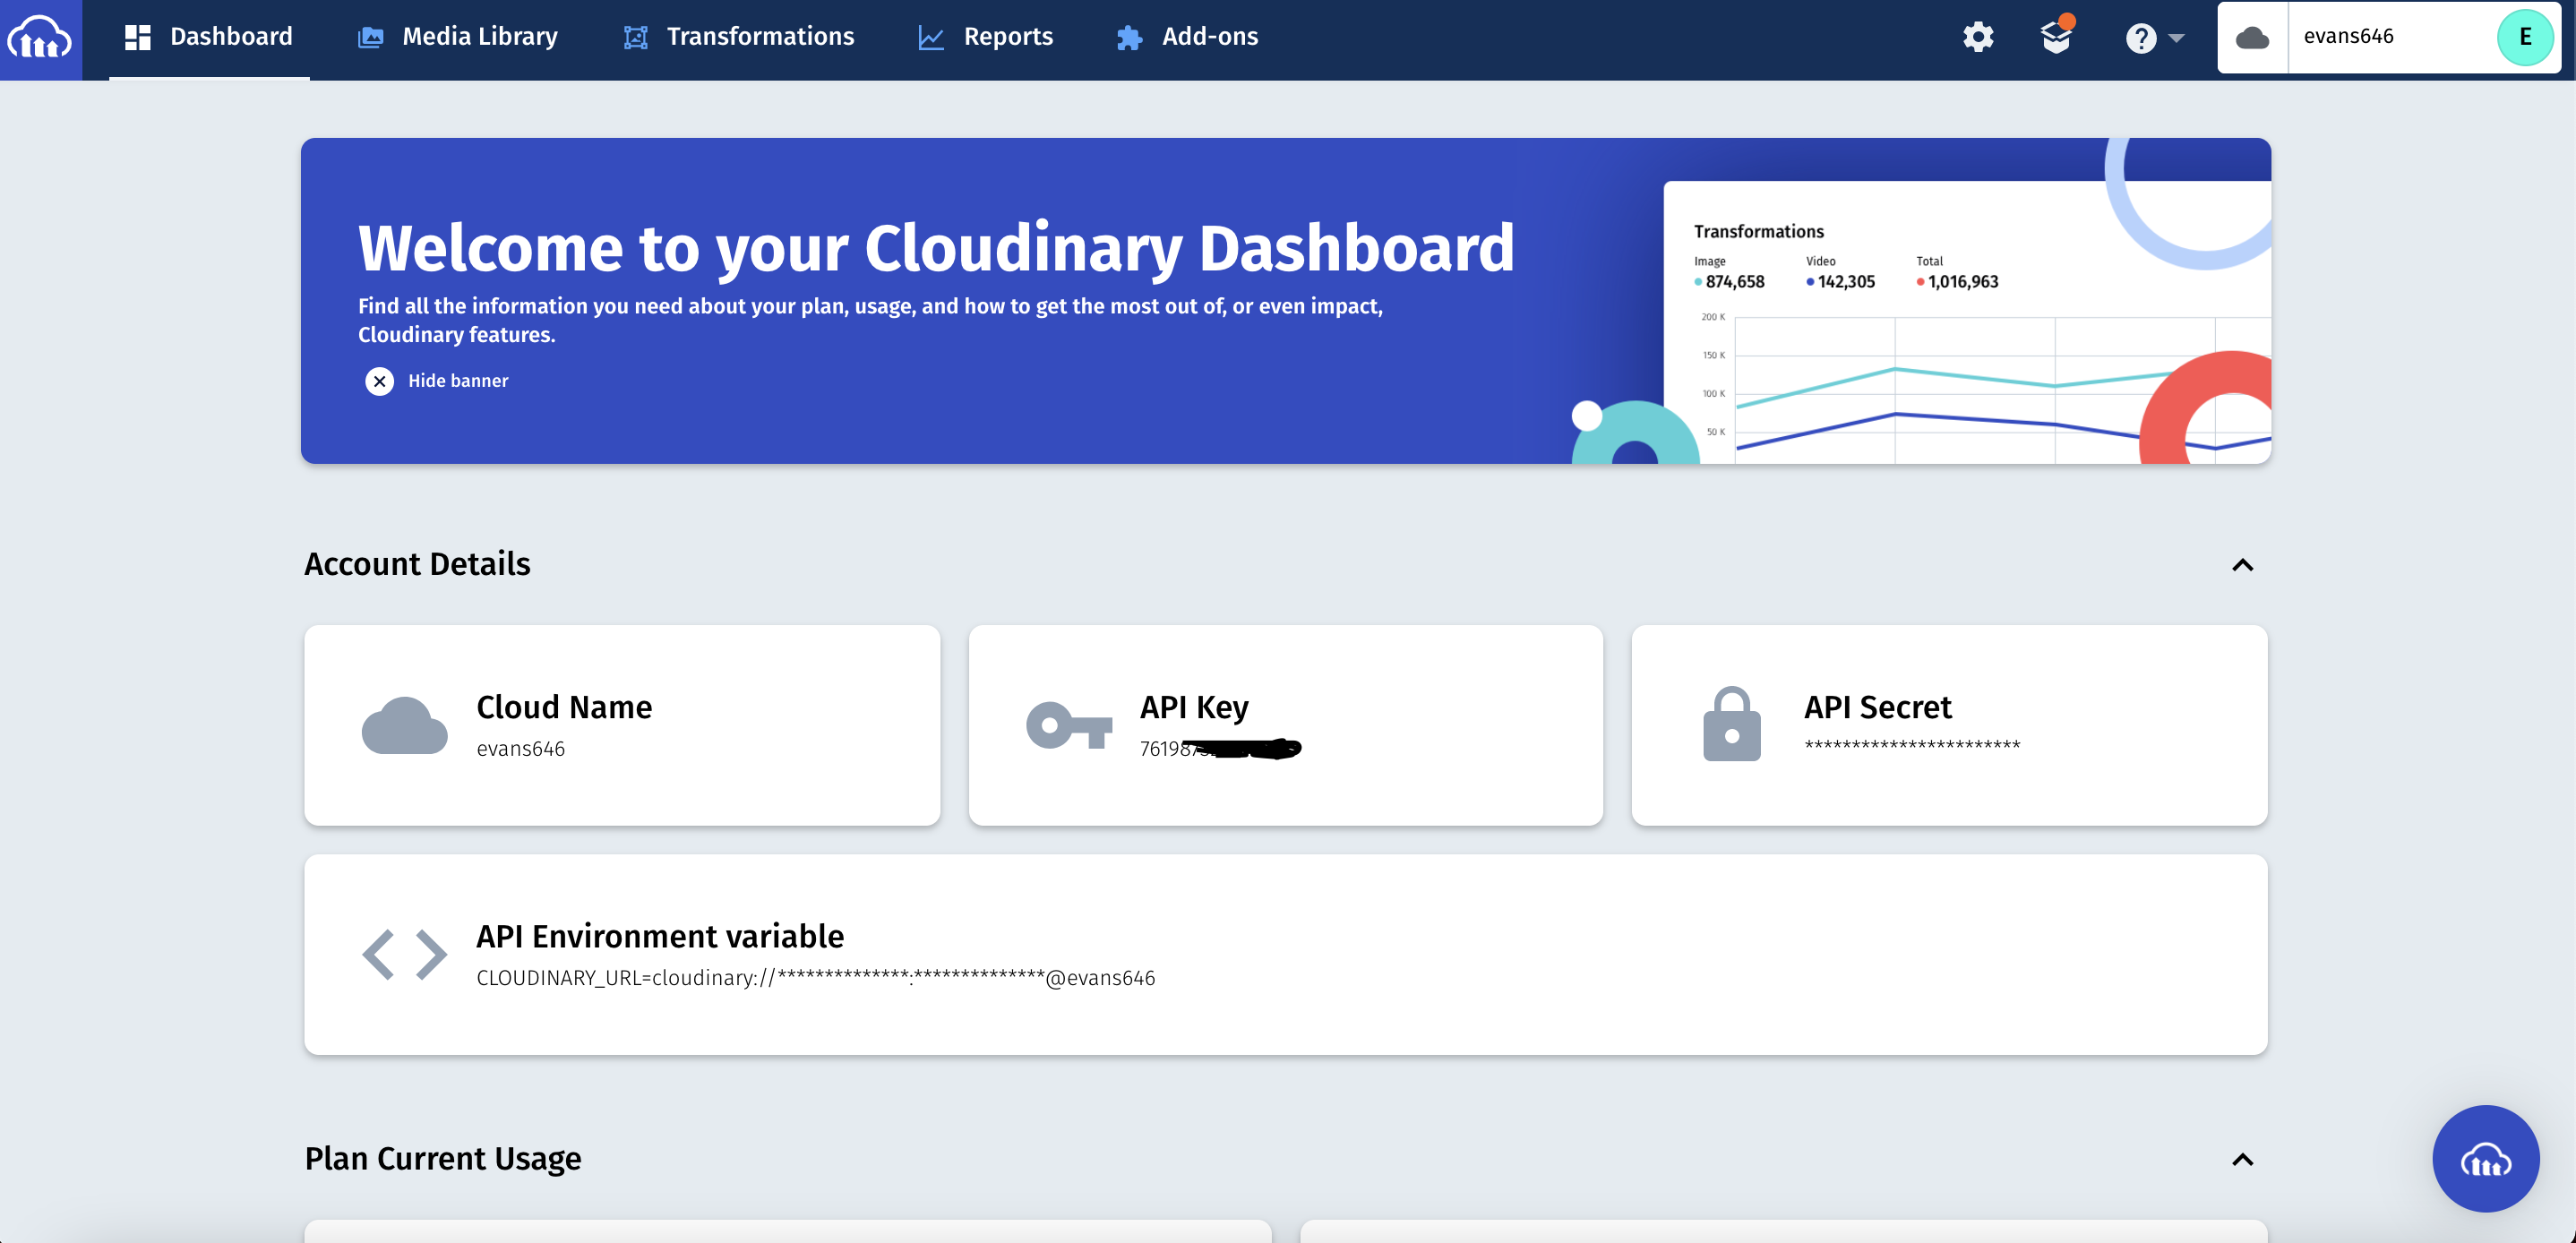
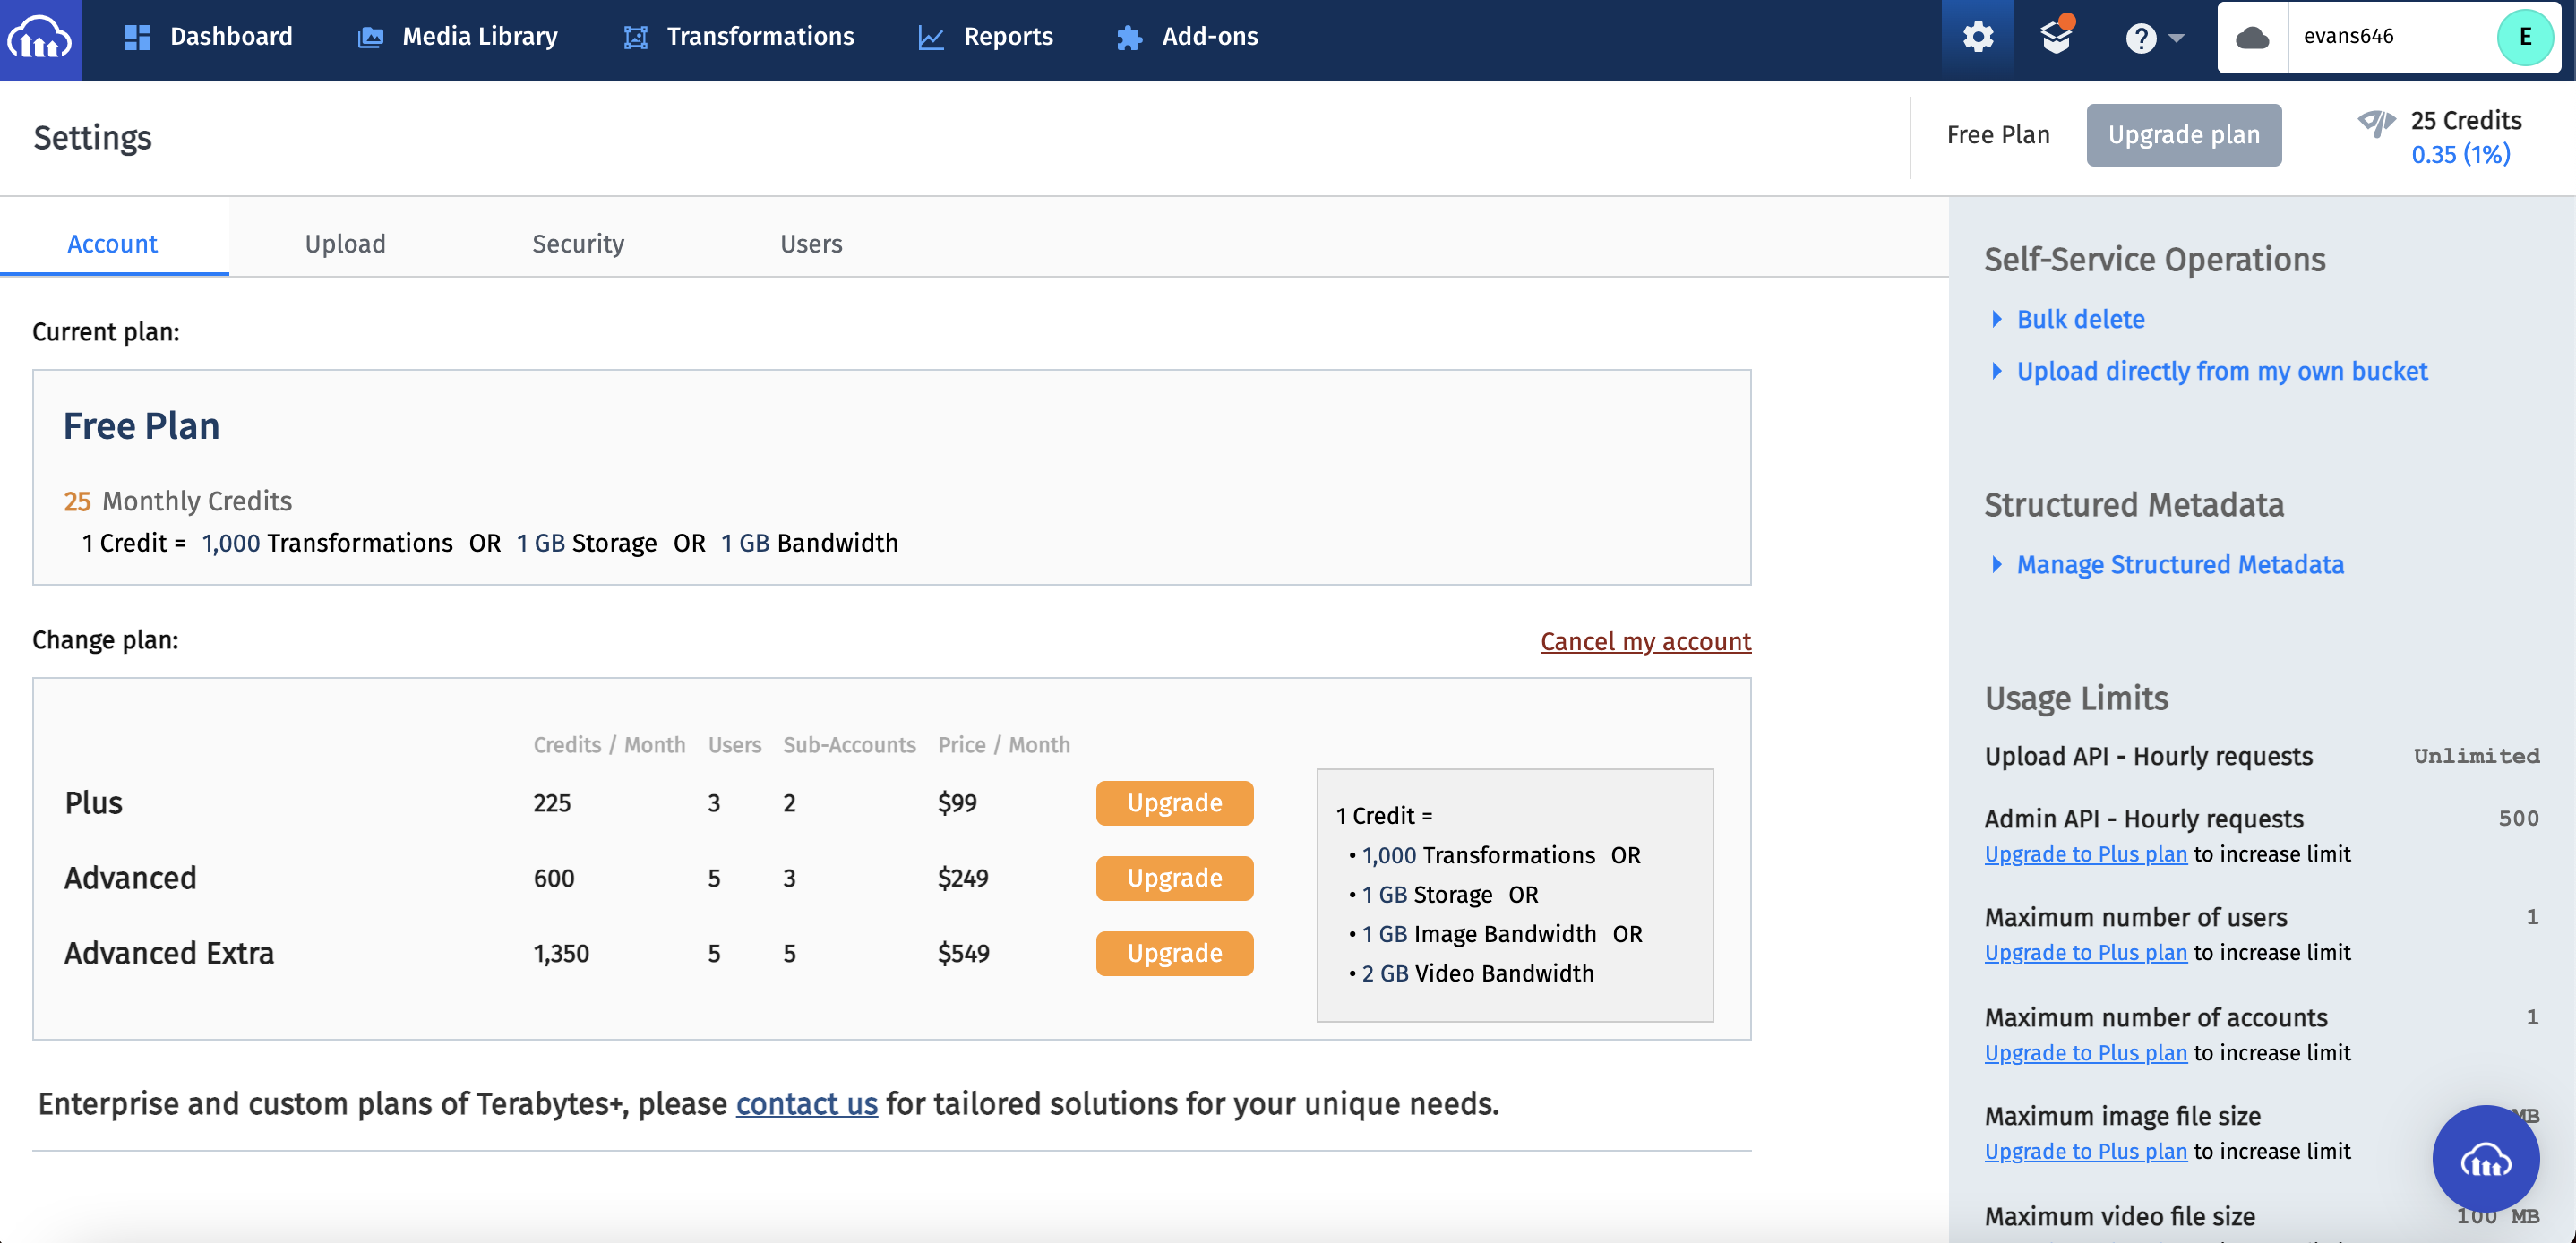
You can find your CLOUD NAME, API and SECRET KEY on the dashboard good!! that means we are ready, you can even go to the settings page to see how you can upgrade your current plan to suit your business needs, but for now we will go with the free plan which gives us 1,000 Transformations OR 1 GB Storage OR 1 GB Bandwidth.
To begin, you should get the exercise files from my Github, follow the instructions in the README.md file to get started. Everything is arranged for you so we can start integrating the image upload functionality.
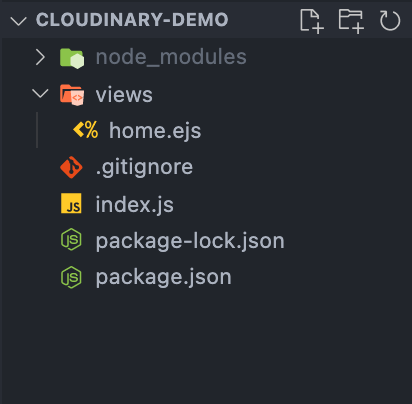
After you're done, your project structure should look like this
 Start the development server with npm:
npm start
And navigate to http://localhost:8080 in your internet explorer to see the starter project

CAUTION ⚠️
If you get any error with nodemon because it's not installed on your machine you can solve it by installing it via npm :
npm install -g nodemon
Or yarn :
yarn global add nodemon
Now we can install the rest of the packages needed for the project which is Cloudinary , multer( Node.js middleware for handling multipart/form-data, which is primarily used for uploading files),multer-storage-cloudinary ( A multer storage engine for Cloudinary) and dotenv to set up the environment variables, with npm :
npm install cloudinary multer multer-storage-cloudinary dotenv
After these are done installing, we need to configure the storage, in the top level directory ( same as index.js) create a storage directory by running this command or create it manually :
mkdir storage
This will create storage directory, open and create a file storage.js inside the storage directory,
run this command to create it :
cd storage && touch storage.js
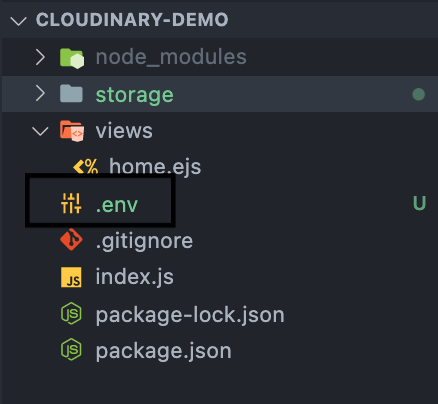
Good! now our project structure should look like this
 Open
Open storage.js and require Cloudinary and multer-storage-cloudinary
const cloudinary = require('cloudinary').v2;
const { CloudinaryStorage } = require('multer-storage-cloudinary');
Now we can use multer-storage-cloudinary' to create the storage engine to store images in Cloudinary , firstly we need to configure Cloudinary with the cloud_name, api_key and api_secret and use the configuration to create the storage engine with multer-storage-cloudinary', paste the following code below what you just required on storage.js :
cloudinary.config({
    cloud_name:process.env.CLOUD_NAME,
    api_key: process.env.CLOUDINARY_KEY,
    api_secret:process.env.CLOUDINARY_SECRET
});

const storage = new CloudinaryStorage({
    cloudinary,
    params: {
        folder: 'CloudinaryDemo',
        allowedFormats: ['jpeg', 'png', 'jpg'],
    }
});

module.exports = {
    storage
};
So the storage.js file should look like this
const cloudinary = require('cloudinary').v2;
const { CloudinaryStorage } = require('multer-storage-cloudinary');

cloudinary.config({
    cloud_name:process.env.CLOUD_NAME,
    api_key: process.env.CLOUDINARY_KEY,
    api_secret:process.env.CLOUDINARY_SECRET
});

const storage = new CloudinaryStorage({
    cloudinary,
    params: {
        folder: 'CloudinaryDemo',
        allowedFormats: ['jpeg', 'png', 'jpg'],
    }
});

module.exports = {
    storage
};
NOTE : Allowed formats can be omitted and cloudinary will deliver the image as the original image's format.
Since we are the using the environment variables to configure Cloudinary which does not exist yet in the project, we can create the file and embed the CLOUD_NAME, CLOUDINARY_KEY and CLOUDINARY_SECRET
In the same directory as index.js run :
touch .env
This will create .env file
 Open and paste the following code in it :
CLOUD_NAME= your cloud name goes here
CLOUDINARY_KEY=  your API KEY goes here
CLOUDINARY_SECRET= your secrete goes here
Now go back to Cloudinary's dashboard to copy the details and set them in the .env file accordingly
[ see below image]
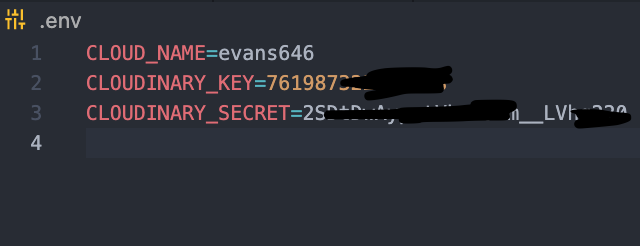
Once you are done, your .env file should copy this
 Good now let's require
 multer and the storage we exported from storage.js so we can configure it to work with express to upload images, open index.js file and require (on the top level preferably below port):
const { storage } = require('./storage/storage');
const multer = require('multer');
const upload = multer({ storage });
If you check above, we are requiring multer and the storage configuration we exported from storage.js and passing the storage to multer to use the cloudinary storage instance. (Multer acts as a storage engine for Cloudinary).
Finally we can configure the route and pass upload to it so we can upload images, in the same index.js, paste this code (below " code goes here"):
//we used upload.single to tell "multer" to upload
// only single image
 app.post('/upload', upload.single('image'), (req, res) => {
  console.log(req.file);
  res.send('Done');
});
NOTE: Cloudinary gives us the flexibility to specify the maximum and minimum number of images we wish to upload, here we specified single meaning to upload one image file, conversely we can pass upload.array to upload multiple images.
We need to make the environment variables available in the project so paste this on (line 1 top level) in index.js file:
require('dotenv').config();
The complete entry file index.js should look like this :
require('dotenv').config();
const express = require('express');
const app = express();
const path = require('path');
const ejs = require('ejs');
const port = 8080;

const { storage } = require('./storage/storage');
const multer = require('multer');
const upload = multer({ storage });

app.use(express.json());
app.use(express.urlencoded({ extended: true }));

app.set('view engine', 'ejs');
app.set('views', path.join(__dirname, './views'));

app.get('', (req, res) => {
  res.render("home");
});

// code goes here
 app.post('/upload', upload.single('image'), (req, res) => {
  console.log(req.file);
  res.send('Done');
});

app.listen(port, () => {
  console.log(`Server is listening on port ${port}`);
});
In order to upload images, open home.ejs file, specify the form action to /upload and method to POST additionally set the form encoding data type attribute to accept multipart/form-data so we can upload images and files through the form.
 <form action="/upload" method="POST" enctype="multipart/form-data">
              <div class="mb-3">
                    <div class="form-file custom-file">
                        <input class="form-control" type="file" id="formFile" name="image" multiple>
                        <label class="form-file-label" for="image"
                        </label>
                    </div>
           </div>
     <button type="submit" class="btn btn-success">Upload</button>
</form>
The action attribute specifies where to send the form-data when a form is submitted. We specified in the post route to /upload and that is where the form will be submitted to.
The enctype attribute specifies how the form-data should be encoded when submitting it to the server. It can be used only if method="POST"
And the method specifies the HTTP verb we are using in this case POST.
Now with all this in place, we can we can start the server if not already started and navigate to http://localhost:8080 in your internet explorer, upload image through the form within the specified formats eg. jpeg, jpg, png.
If everything goes well , you should get something like this
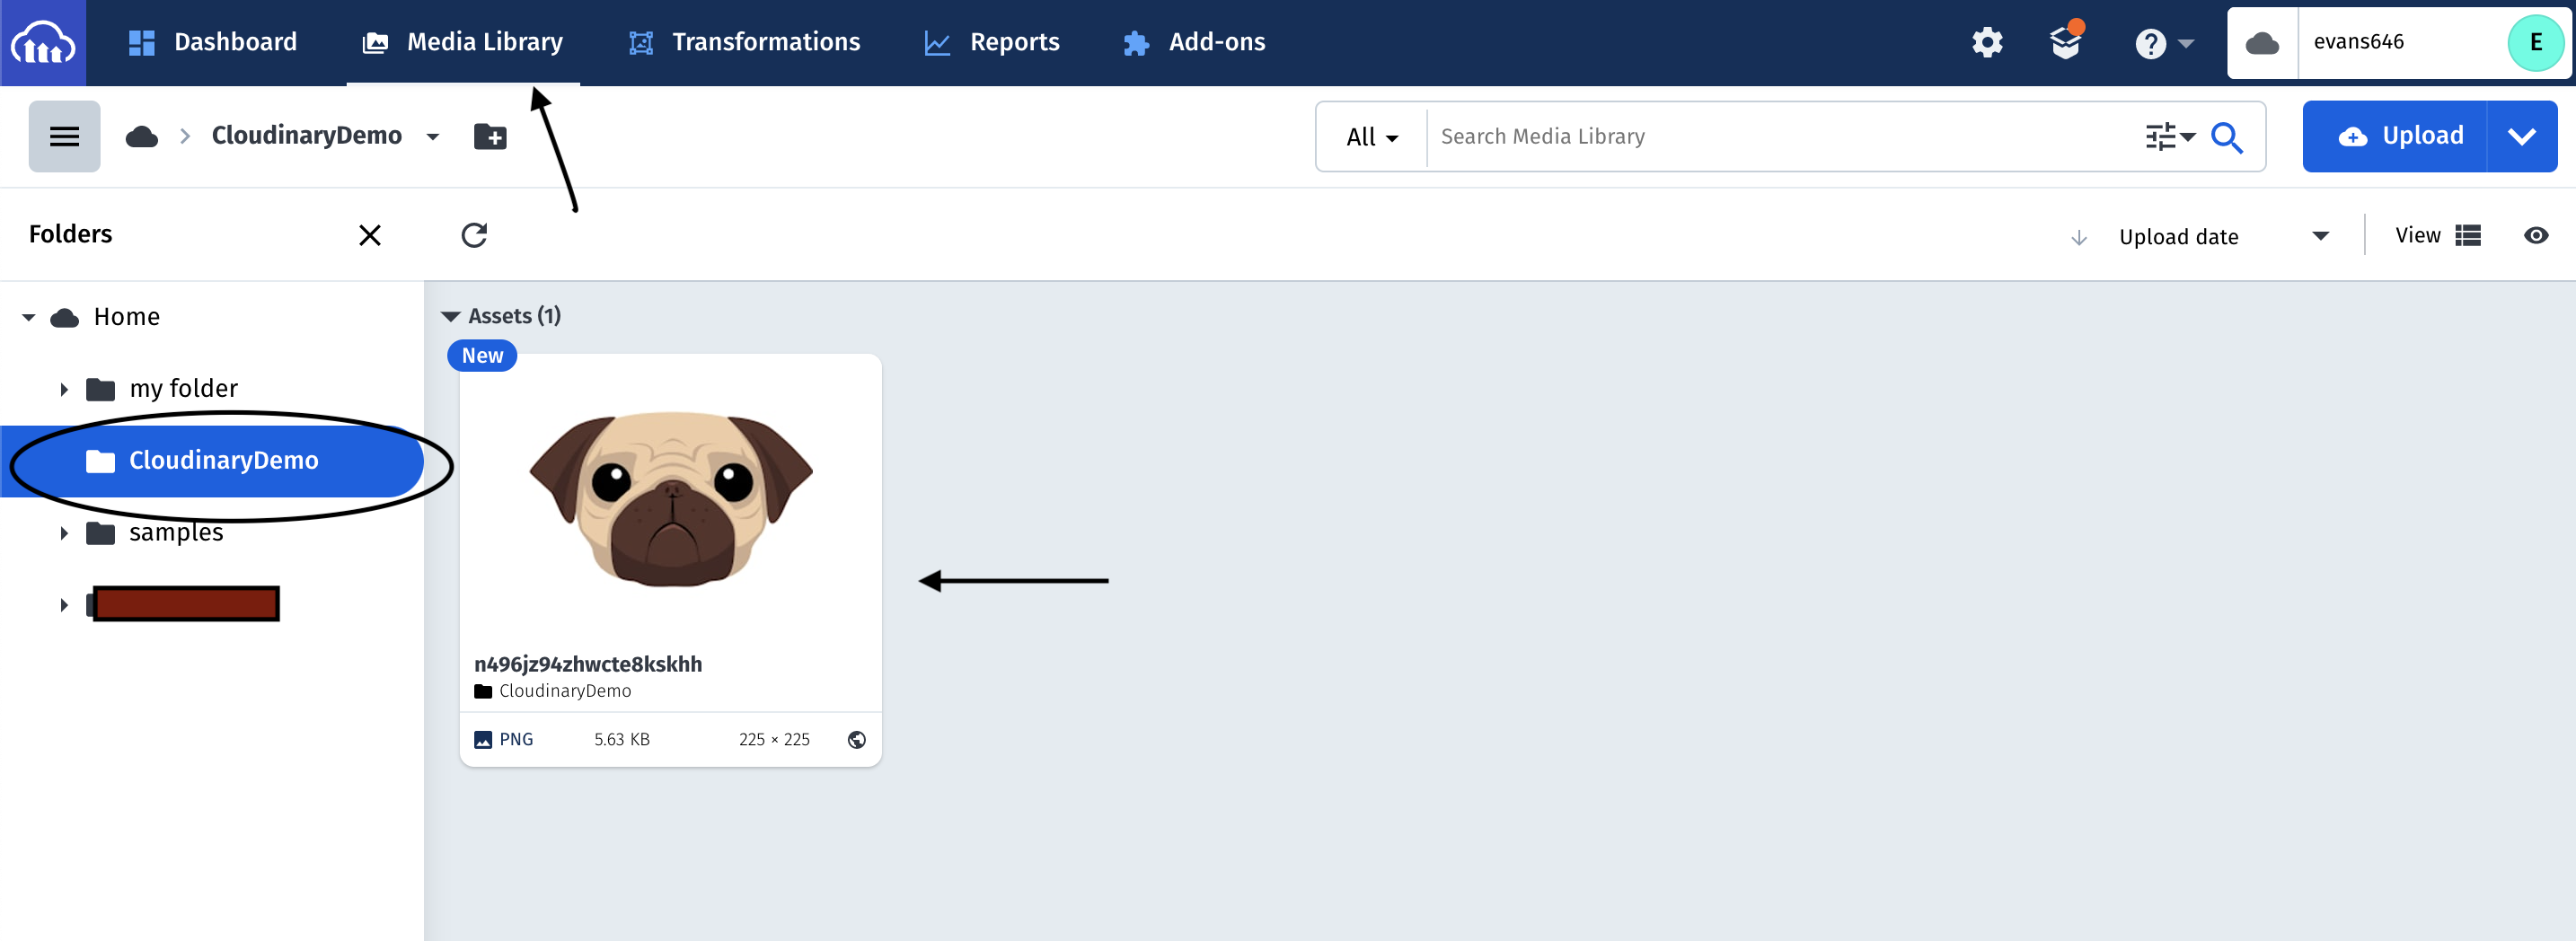
 Indicating that the image was uploaded successfully, and when you go to
 Cloudinary's dashboard, Media library you can see Cloudinary made a new folder for us as specified in the storage configuration CloudinaryDemo and stored the uploaded image in that folder.
 And in the terminal since we logged req.file to the console, we can see what cloudinary gives us in return to the image upload.
{
  fieldname: 'image',
  originalname: 'download.png',
  encoding: '7bit',
  mimetype: 'image/png',
  path: 'https://res.cloudinary.com/evans646/image/upload/v1643114879/CloudinaryDemo/n496jz94zhwcte8kskhh.png',
  size: 5761,
  filename: 'CloudinaryDemo/n496jz94zhwcte8kskhh'
}
The path is the url of the image that we can use in our projects and or web applications. When you click on it (command+ left click) on mac or copy the path and paste it in your browser and you can see the same image that we uploaded to Cloudinary .
Summary
You have learned how to upload images with node.js and express to Cloudinary with the Node.js SDK which provides simple image and video upload, transformation, optimization, and delivery capabilities that you can implement using code that integrates seamlessly with your appliaction.
Cloudinary enables users to upload, store, manage, manipulate, and deliver images and videos for websites and applications. You can check out the documentation here
If you run into any issue, you can always comment here or connect with me on Linkedin Instagram Twitter
Congratulations
Thanks a lot for coming through and Good luck! to you as well.


