Set Up Your First Django Project

In this article, I’ll walk you through the creation of a basic Django application.
Prerequisites
- Basic Python knowledge is required
- Basic Web dev knowledge ( HTML,CSS,JAVASCRIPT)Python is a plus+
- No prior Django knowledge is required
What is Django
Django It is a high-level Python web framework that encourages rapid development and clean, pragmatic design.
Why Django ?
Django offers a quick way of developing web applications and also takes care of much of the hassle of web development. Here are some of the advantages that Django offers.
- Django is fast : Django was designed to help developers take applications from concept to completion as quickly as possible.

- It is secure : Django takes security seriously and helps developers avoid many common security mistakes.
- Django applications are scalable.
Django being a Python web framework, it requires Python so you must have the latest version of python installed on your system, you can install the latest version here
After installation is done, you can check the version in the terminal with the following command :
python3 --version
Output :
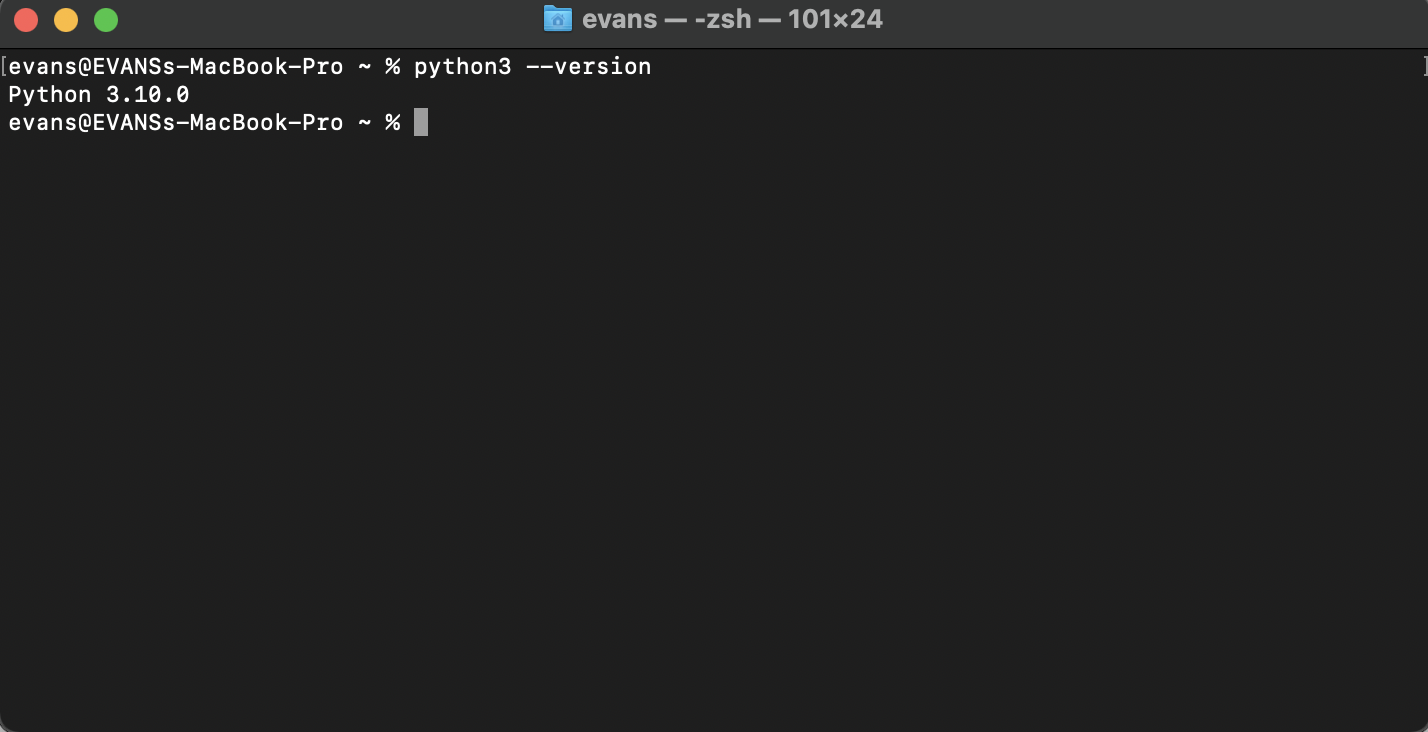
As you can see my is version 3.10.0, good! your version maybe different, there are other versions that is compatible with Django, you can check it out here . Before you can use Django, you’ll need to install it so let's install it if you don't have it installed already, first you must have pip installed, you can install it here or use this command :
python3 get-pip.py
After installation is done, install Django with the following command :
python3 -m pip install Django
Nice 👻 this will install Django. Let's verify that Django can be seen by Python, from the terminal, type python3. You should see something like this
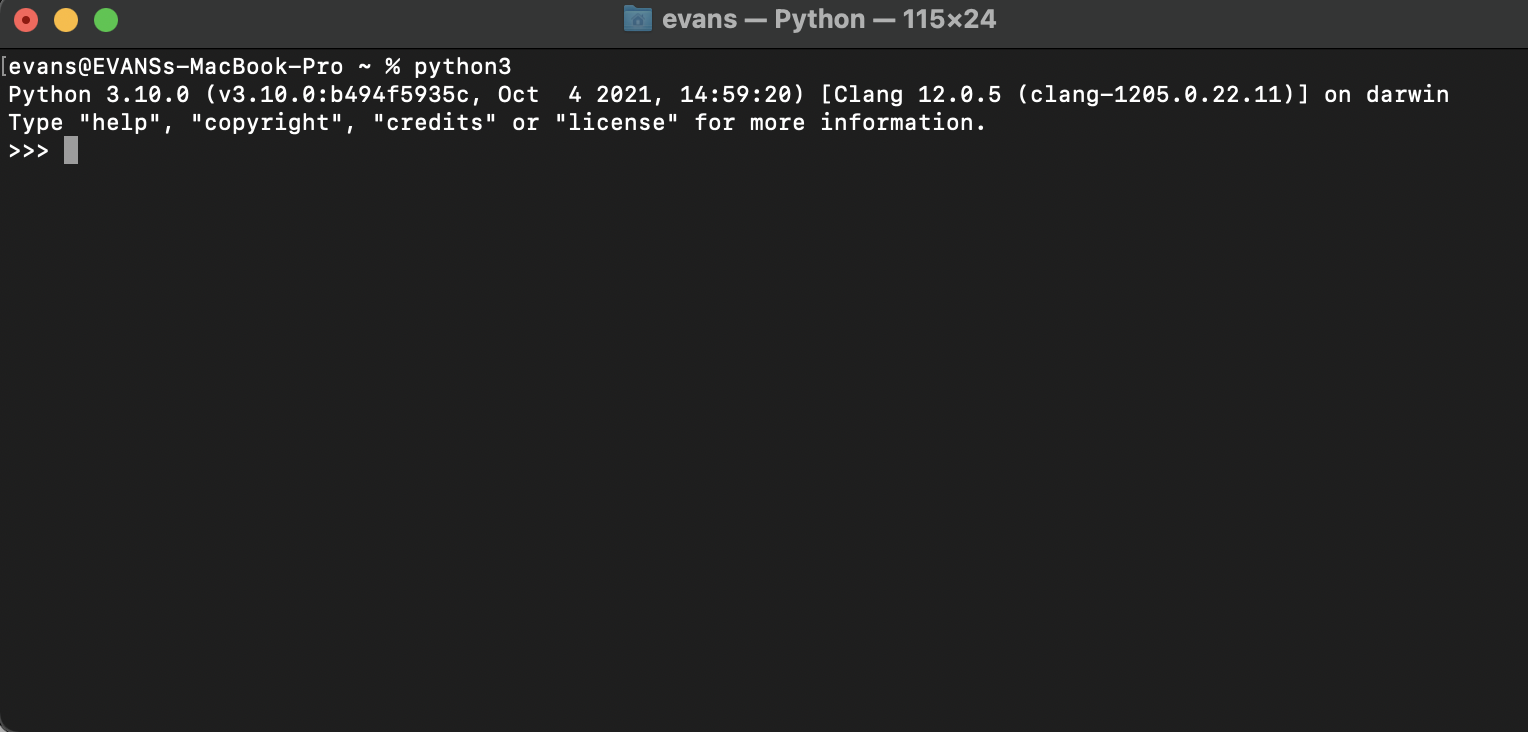
Then at the Python prompt, try to import Django:
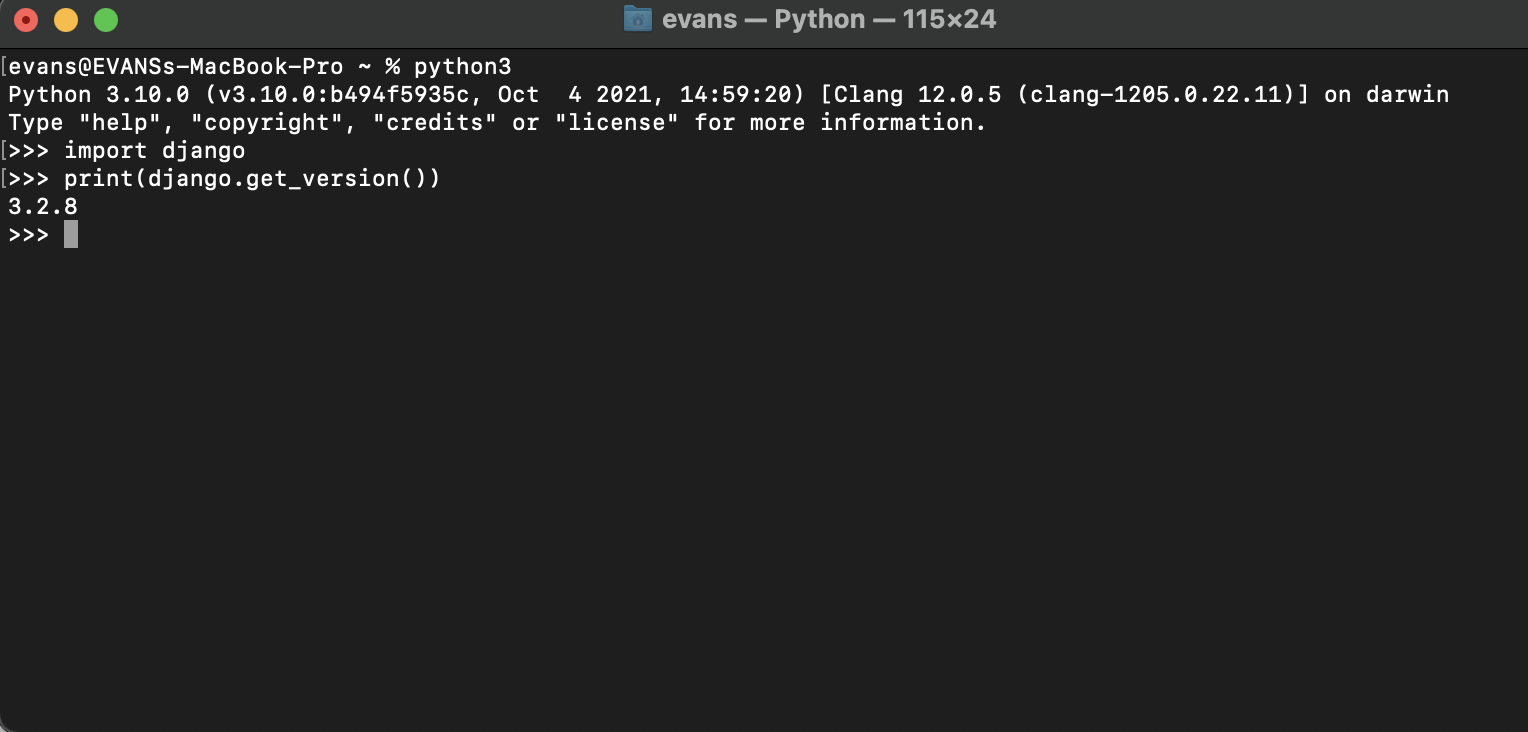
You may have other version of Django installed, you can see my version is 3.2.8
That’s it!!!!! To start a new Django project, change directory to where you want to start your project and run this command:
django-admin startproject myfirstapp
This will create myfirstapp directory in your current directory
NOTE
myfirstapp is the name of the project
Let’s look at what startproject created:
 myfirstapp/
    manage.py
     myfirstapp/
        __init__.py
        settings.py
        urls.py
        asgi.py
        wsgi.py
Great let’s verify the Django project if is is up and running correctly. Change into the outer myfirstapp directory, if you haven’t already, and run the following commands:
cd myfirstapp
And start the development server:
python3 manage.py runserver
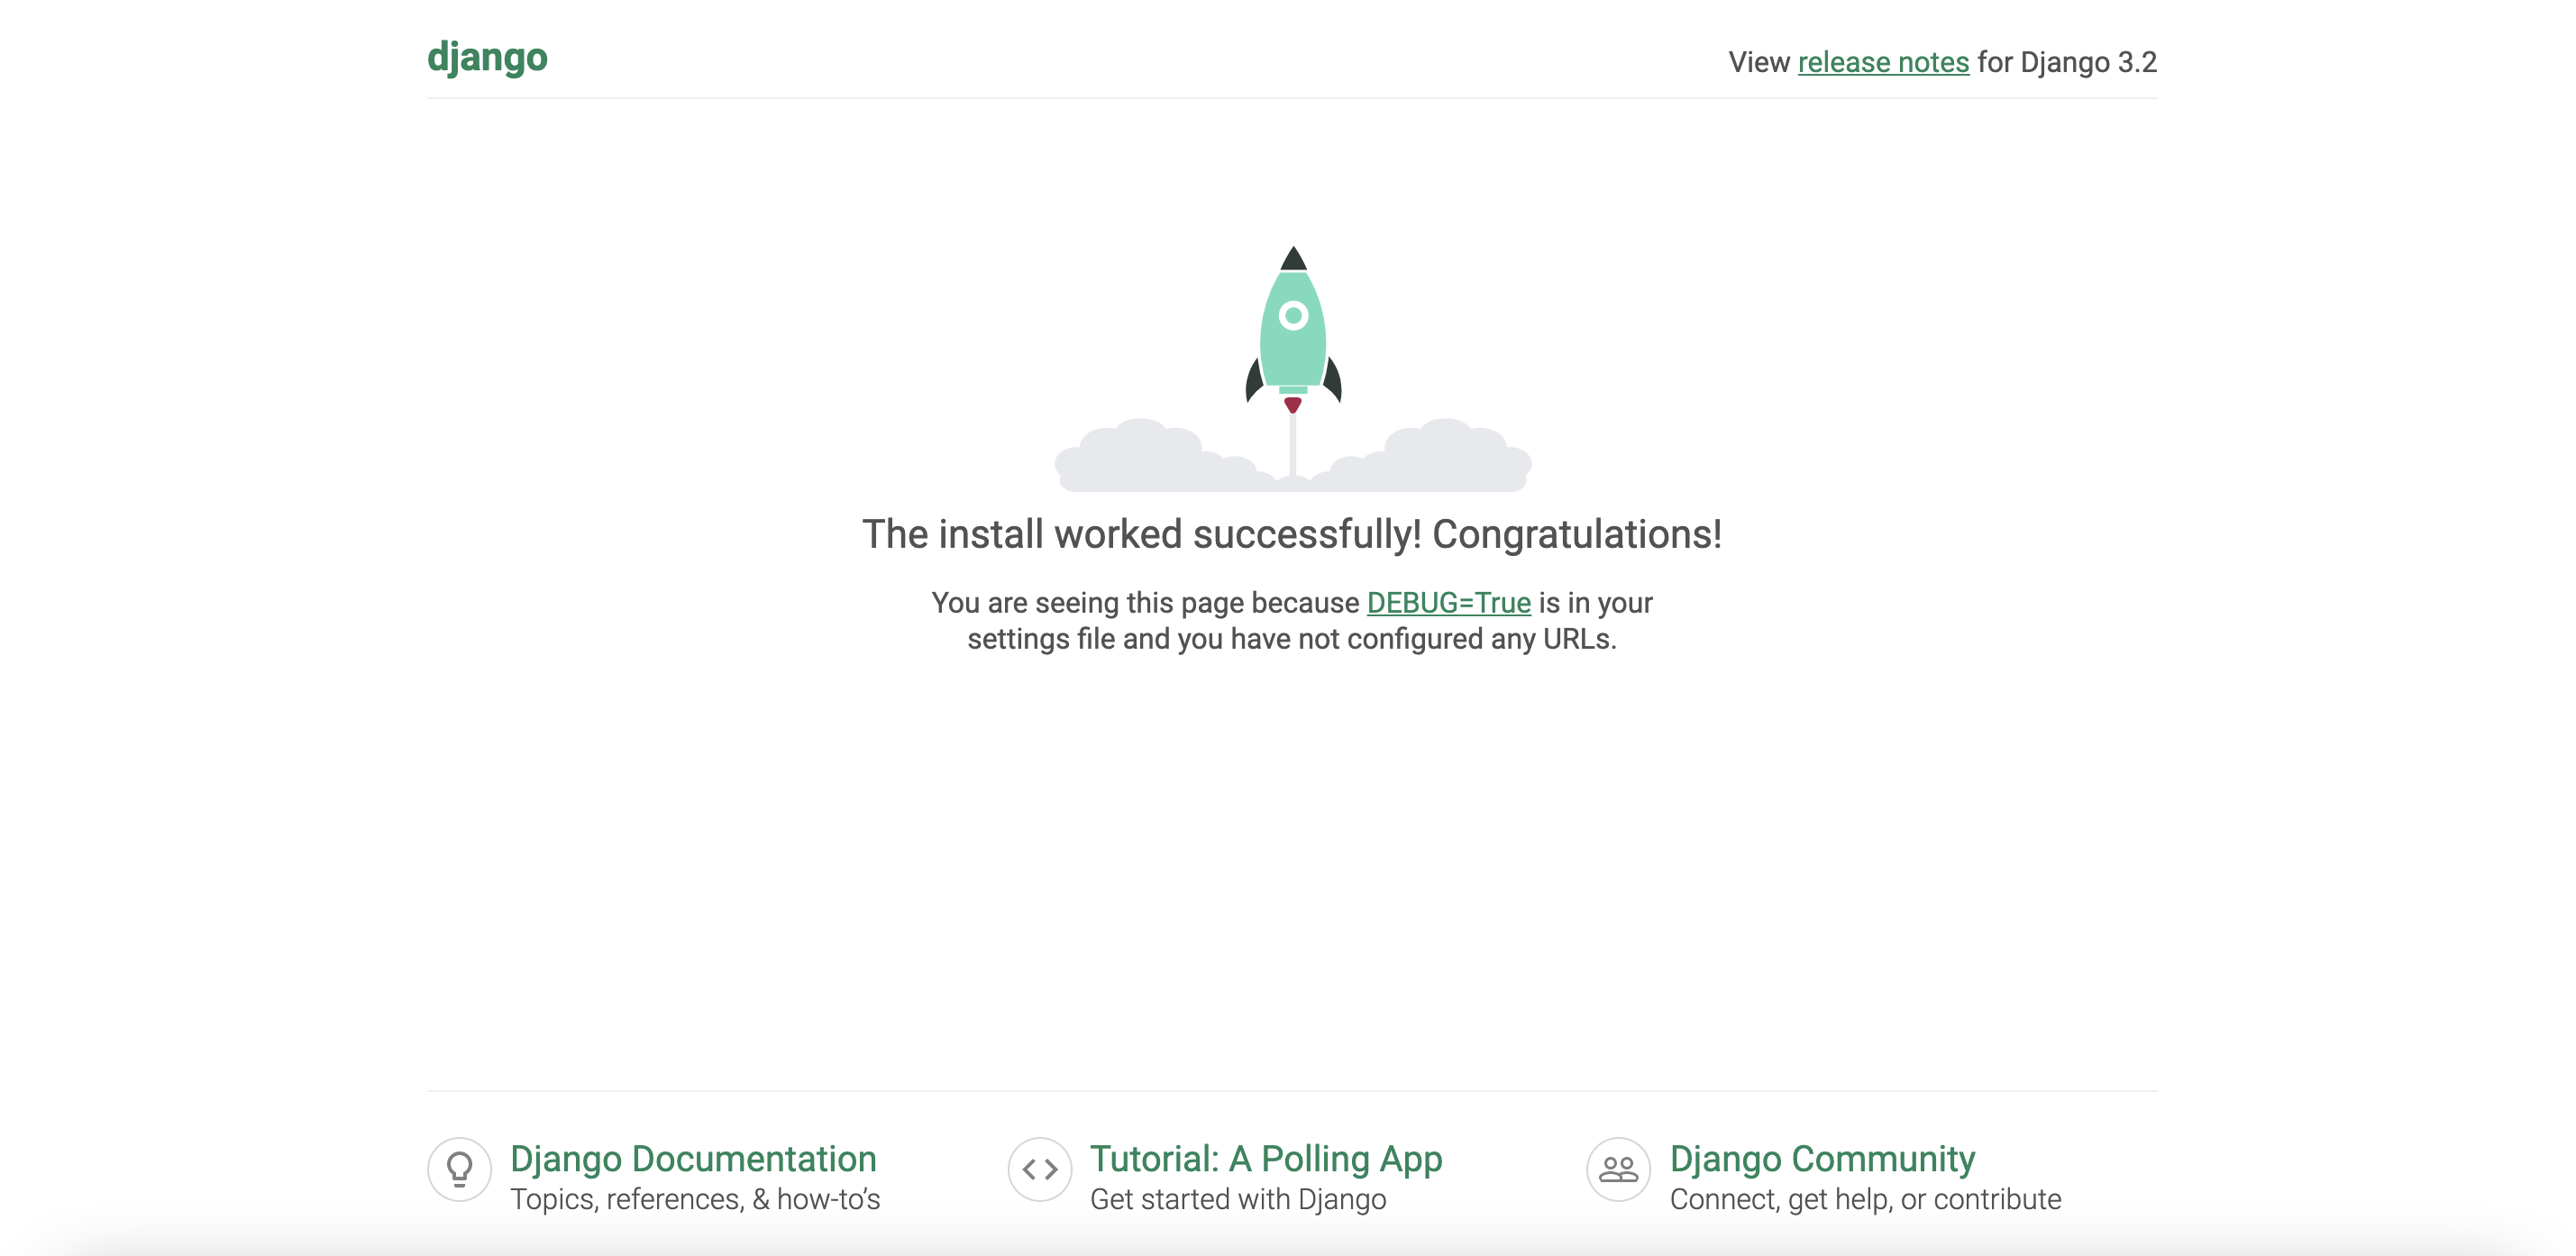
This will run the server and If everything went smooth you should see this in the terminal

Now navigate to http://127.0.0.1:8000/ in your browser and you should see the project up and running.
Congrats!!
Django Project and App
In Django, a project refers to the entire application and all its parts where as an app refers to a submodule of the project. Apps can be used in multiple projects. Example, the project is the whole website, you might structure it so there is an app for posts, an app for ranking tables, and an app for fixtures and results. If they need to interact with each other, they do it through well-documented public classes and accessor methods.
In the same directory as manage.py , let's go ahead and create an app for the project, in the terminal run this command :
django-admin startapp posts
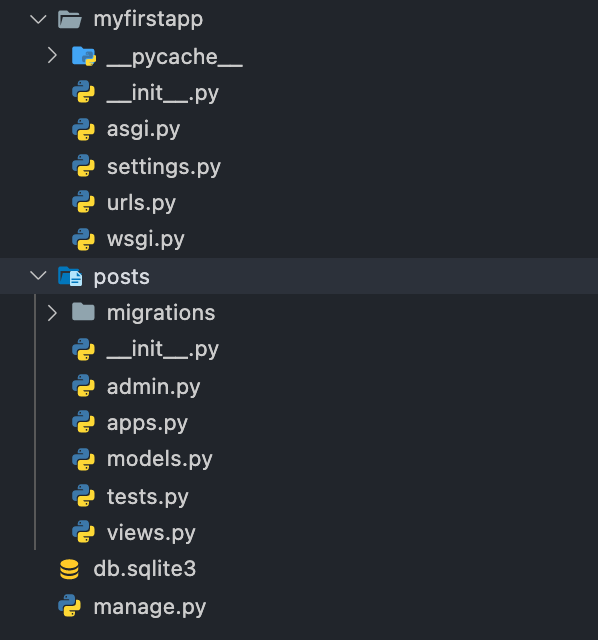
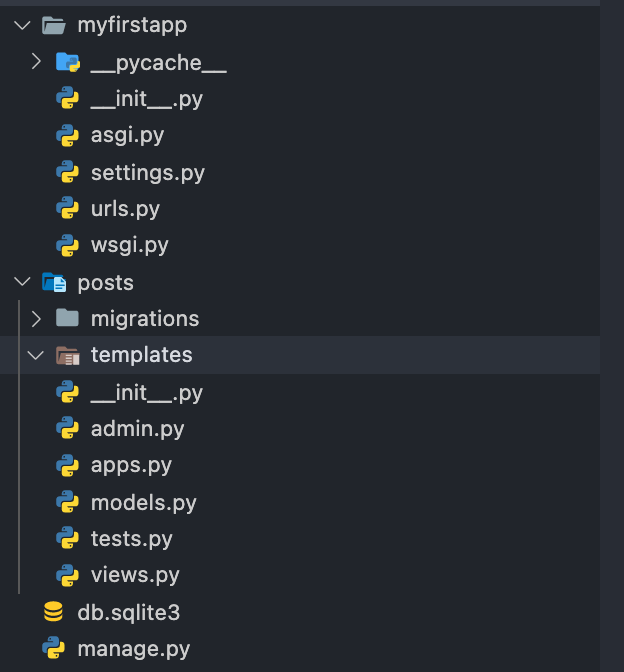
This will create a new directory posts inside the project directory with the following contents
posts/
    __init__.py
    admin.py
    apps.py
    migrations/
        __init__.py
     __init__.py
    models.py
    tests.py
    views.py
    db.sqlite3
We can register the posts app in the project by opening the setting.py file in myfirstapp, under installed apps section, add posts:
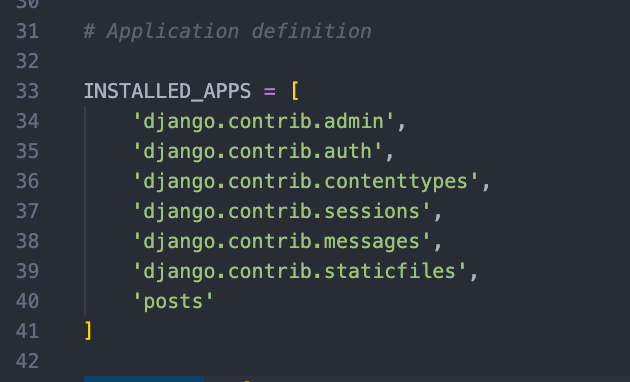
The INSTALLED_APPS setting holds the names of all Django applications that are activated in this Django instance.
We are done setting up the whole project. Let’s write the first view
Open the file posts/views.py file and paste the following Python code in it:
# Create your views here.
def index(request):
    return render(request,'posts/index.html')
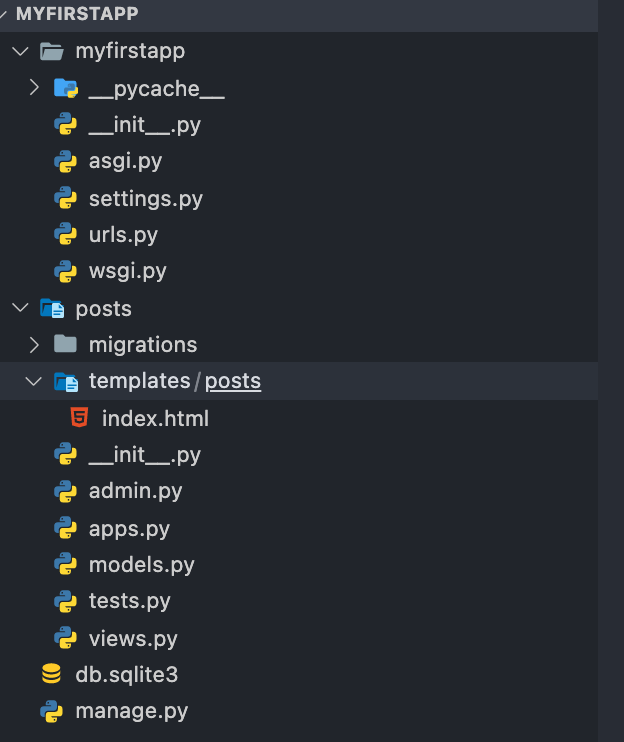
Since index.html does not exist, we can create it in the posts directory either manually or by running this command in the same directory as manage.py:
cd posts && mkdir templates
This will create a new directory templates inside the posts directory
Good now create a new directory posts inside the templates directory and create the index.html file in that directory or run this command inside the templates directory:
mkdir posts && cd posts && touch index.html
This will make a new posts directory inside templates and create the index.html file in it
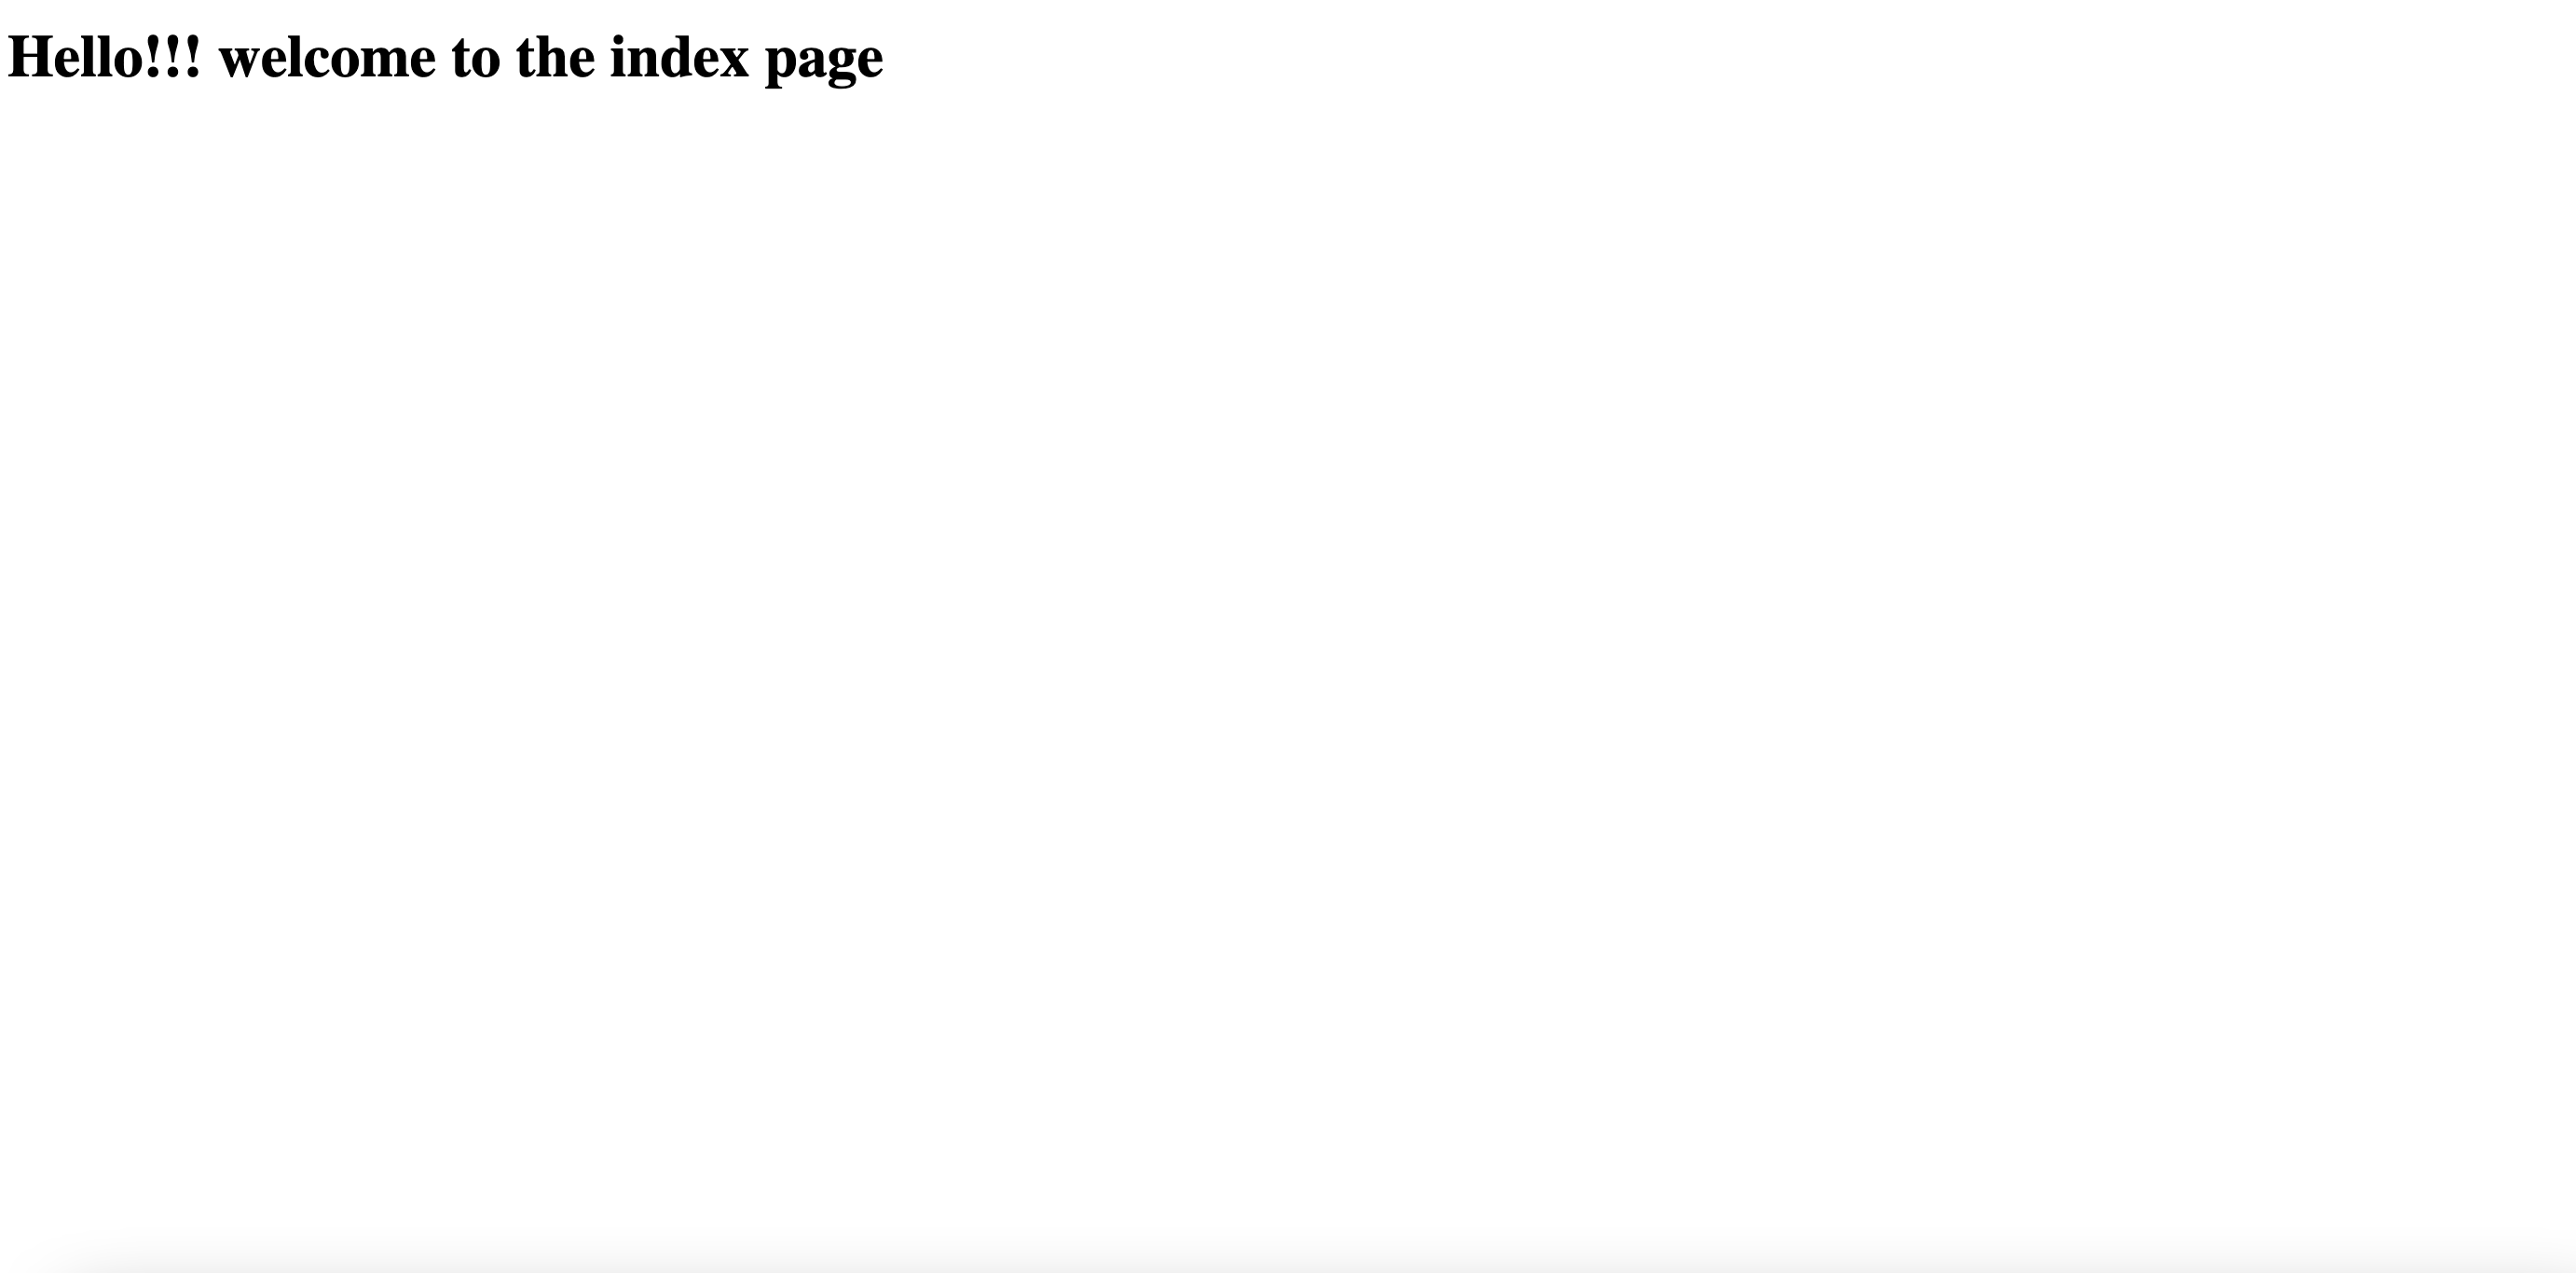
Open the index.html file and paste the following code in it :
<!DOCTYPE html>
<html lang="en">
<head>
    <meta charset="UTF-8">
    <meta http-equiv="X-UA-Compatible" content="IE=edge">
    <meta name="viewport" content="width=device-width, initial-scale=1.0">
    <title>Posts index</title>
</head>
<body>

    <h1>Hello!!! welcome to the index page</h1>
</body>
</html>
To call the index view that we defined in views.py so the page can be displayed, we need to map it to a URL - and for this we need a URLconf
To create a URLconf, in myfirstapp directory, there is a file called urls.py, import the app views and path:
import posts.views
from django.urls import path
And add this code just below in the urlpatterns :
path('',posts.views.index, name='index'),
The urls.py should look like this :
from django.contrib import admin
from django.urls import path
import posts.views

urlpatterns = [
    path('admin/', admin.site.urls),
    path('',posts.views.index, name='index'),
]
The path() function is passed four arguments, two required: route and view, and two optional: kwargs, and name. route is a string that contains a URL pattern. view When Django finds a matching pattern, it calls the specified view function with an HttpRequest object as the first argument and any “captured” values from the route as keyword arguments. Naming your URL lets you refer to it unambiguously from elsewhere in Django, especially from within templates.
You have now wired an index view into the URLconf. Verify it’s working with the following command:
python3 manage.py runserver
And navigate to http://127.0.0.1:8000/ in your browser and you should see the view rendered!!
CONGRATULATIONS🎉💯
Now you should have a very solid understanding of Django from Installing Django, Creating and understanding Django projects , Understanding URLs, views, requests and Working with templates thank you so much for coming along and happy coding!!!
Get the resource from my github here


